Time spent: 4h
Cumulative time: 66h
Main activities: front wings, engine plumbing, internal trim
With the dire predictions about the weather for tomorrow, I decided to get a few jobs done that would allow me to do work indoors most of tomorrow (instead of in the ice-box garage). Its meant to get really cold tonight.
But first thing was to take back the engine crane to Krazy Horse. It fits into the back of my other car without too much difficulty (although it is really heavy) and its an easy drive across to Bury St Edmunds from here. I was really grateful to Krazy Horse for the loan of this.
On my return, I started to have a look at the front wings. First thing I noticed is that I have already scratched one of them. Lesson learnt – always have something protective between the bench and the wing.
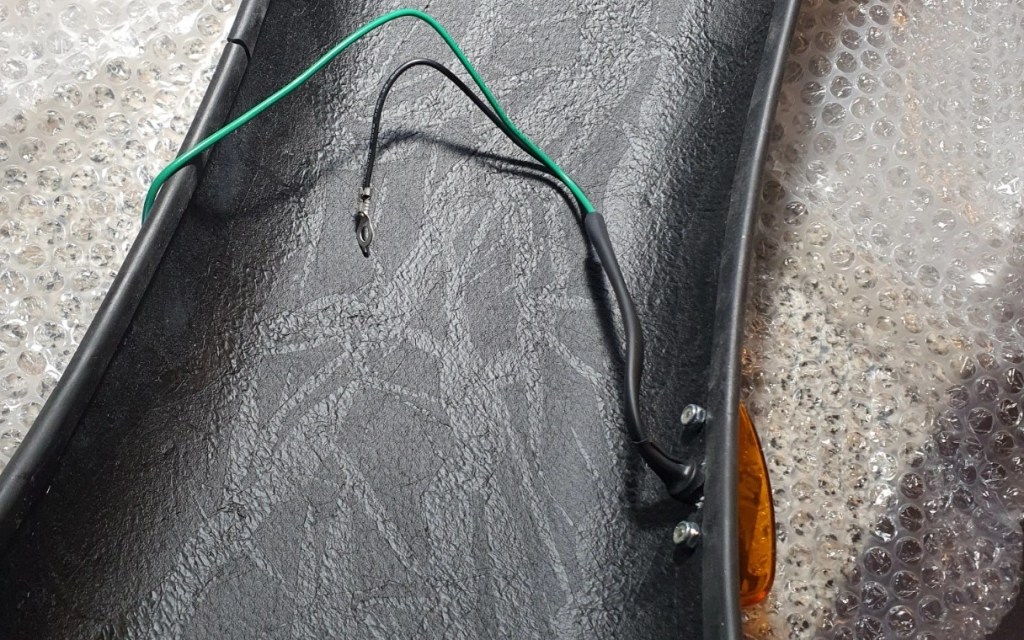
Anyway, I drilled out the hole in each wing that needed expanding to take the indicator repeater and fitted that into the hole. I cant help thinking that the work on the wings is going to be easier to do on the bench (sorry, on a thick cloth on the bench), rather than in-situ. So I also got on and fixed the IVA trim around the perimeter and put the heat shrink on the first bit of the wiring so that is ready.

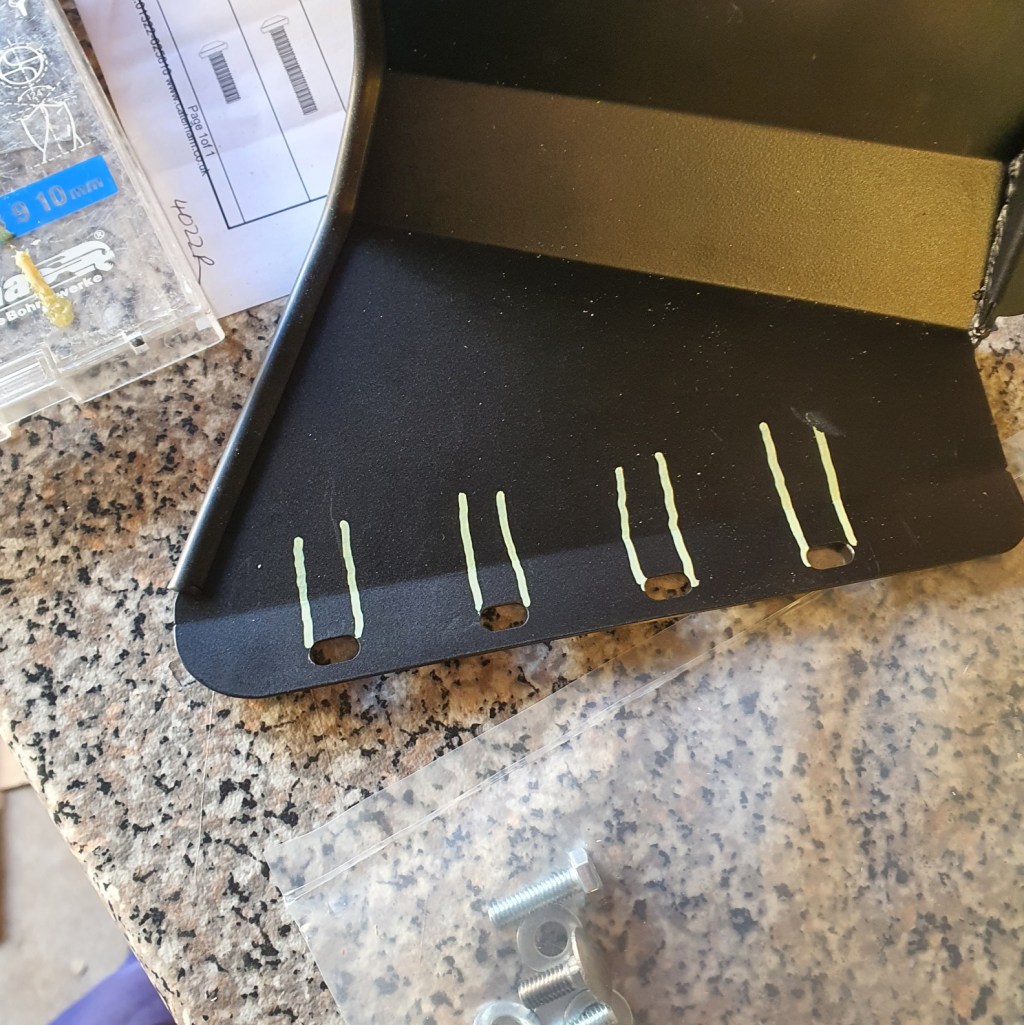
I also decided to make a start on the internals to do a bit of the riveting work that needs doing. The knee guards that have to go in are a bit awkward to fit in behind the trim but it eventually all lined up. I used a chalk marker to indicate where the holes are in the knee trim as these are difficult to align otherwise as they are hidden behind the black rubber trim. The chalk is easy to see and easy to clear off afterwards.
There is some drilling to be done for the screw holes and I was very careful to make sure that I didn’t push too hard on the drill. I suspect that it would be pretty easy to accidentally drill right through the bodywork. The holes for the rivets are already there.
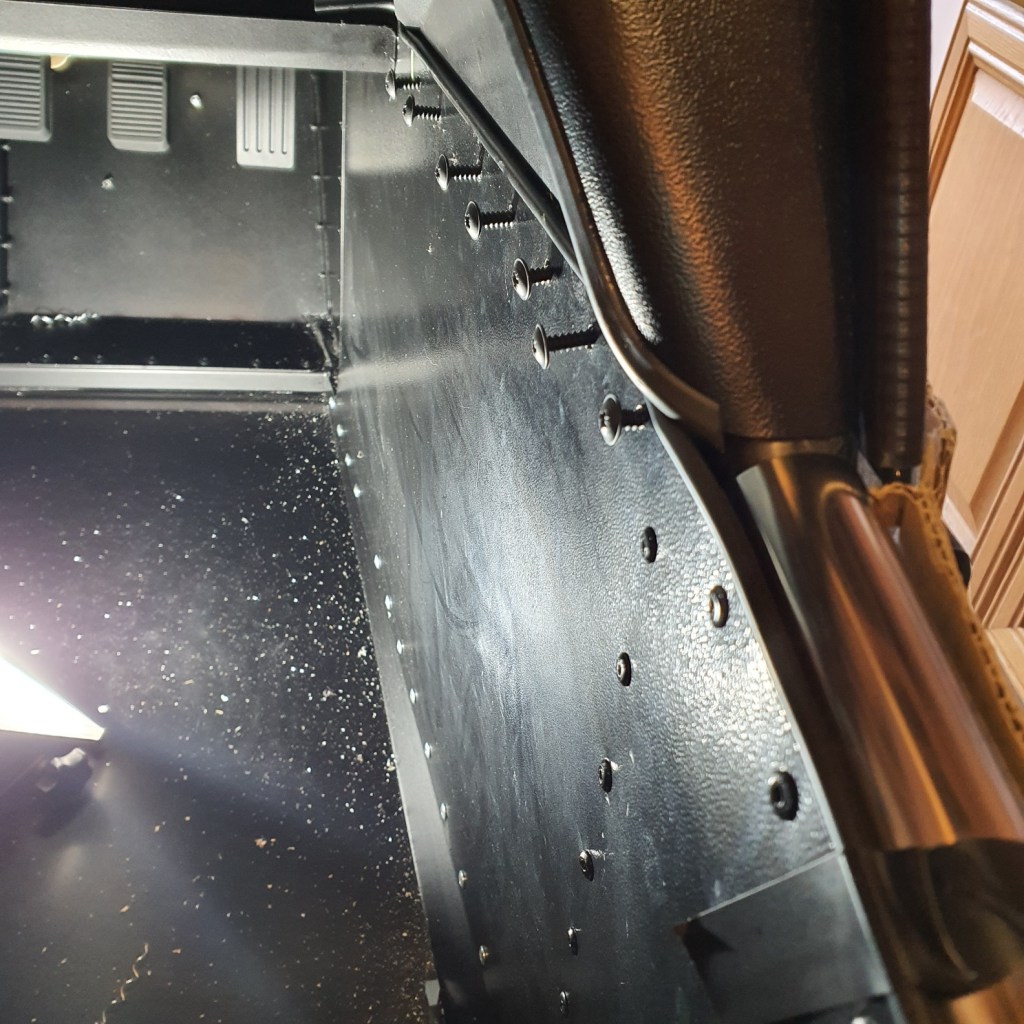
I have done the knee guards on both sides and installed the remaining rivets in the cabin. The riveting is a bit of an art and I learnt very early on to keep your thumbs out of the way when the tool cuts off the excess part of the central pin. The self tapping screws to the top of the side panels are tricky and its very easy to burr out the head. Going to take my time with those. What seems to work best is to drive the screw in as far as it can go and then back it off half a turn and I found that I could then drive it in a bit further. It takes a while doing it this way but if I didn’t, I would find the heads get burred over when the screwdriver slipped.
A flurry of emails from Caterham this morning (thanks Lee), responding to various queries over the last week. They are going to send on the missing parts that I had identified and have confirmed that the gearbox is already oil-filled.
They have also clarified where the bolts that were in two separate unmarked packs go. The bolts with the blue Loctite are for the diff/axle connection.

The other advice was to use the offcut from the return hose for the purge valve hose. I have been struggling to make that work at the engine connection. The fitting is really tight and I am finding that the hose is splitting (I am effectively trying to fit a 8mm hose on a 10mm connection. Will have another go tomorrow with even more silicone spray in there.


Leave a comment